


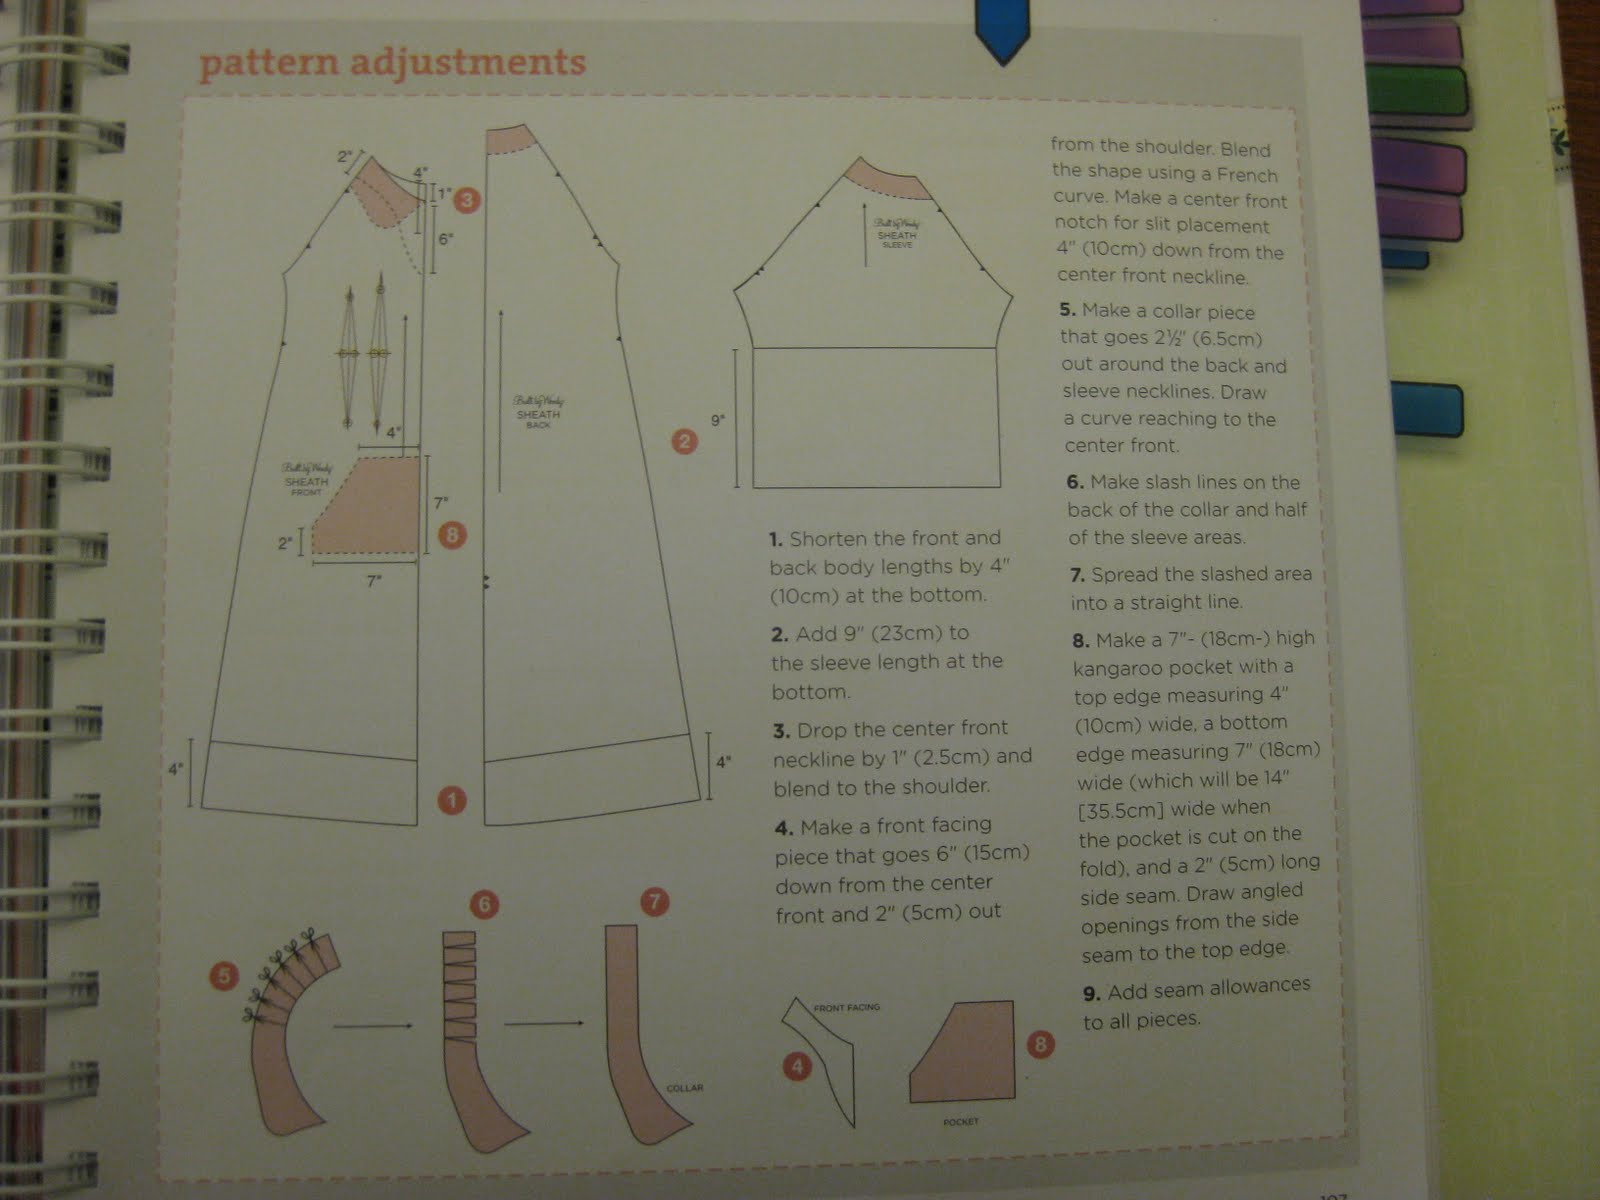
First, I traced basic pattern pieces onto brown paper and made the adjustments for these specific dress shapes.


Then I cut out the fabric: lace and navy silk for the Bold Shoulders and soft Mexican-ish print for the Baja Dress.


I made the Bold Shoulders first. Here's how...
First I sewed darts in the front piece.

After sewing the front to the back at the sides and shoulder, I hemmed the dress.

Then I made bias tape from the same lace fabric and sewed it to the raw edges of the neckline and the armhole.

Finished product:

I did the exact same thing with the navy silk except that the shoulder was on the other side. The finished project was meant to be worn with the lace under the silk, but I think it looks even cuter with the lace on top.
Here it is both ways...


I've been sewing at my parent's house with her nice machine, but between the Bold Shoulders and the Baja Dress, I moved my less-nice machine to my apartment and started sewing here. There's not much room, but I sew too often to keep making the trek.
Here's how I made the Baja Dress.
First, I sewed the back pieces together.

Then, I sewed the raglan sleeves to the front part.

I hemmed the angled parts of the kangaroo pocket and ironed down the other edges.

Then I found the best placement for the pocket by putting the dress over my head and marking with a pin how high I wanted it and using a measuring tape to find the exact center.


After pinning, I topstitched the pocket to the dress's front.

Then, I stitched the sides all the way from the hem up and down the sleeves.

I then hemmed the bottom and the sleeves.

I pinned the collar pieces together right sides together and sewed around the outside.

Then I turned it right-side-out and ironed it smooth.

I pinned the collar to the right side of the dress and sewed.


I laid the facing piece overtop of the collar on the right side of the neck opening, sewed it, turned it under and pressed it with the iron.

I then topstitched around the edge to finish. This is what the directions told me to do. If I had my druthers, I would have done a full facing (not just in front), avoiding the topstitching and creating a cleaner edge, but I didn't have enough scraps of the fabric to do so, so I just followed the directions.


Here's the finished dress.


0 comments:
Post a Comment